
Alright, today's topic are going to address the infamous problem of a local telco 4G USB Dongle. Oh did I say 4G?
So here you go, a YES GO USB Dongle!

In reality, it's an USB Wimax dongle. YTL YES does their marketing and branding well especially they promoted themselves as "4G" at local's pre-4G era. A search in web will make you informed that it's a product of INFOMARK, probably made in Korea and OEM's their product to many Wimax telco in the world as well, Sprint and Clear Spot are some of the remarkable ones.
The stylish, sleek yet sturdy dongle does it jobs well, boasting a 270 degree freedom-angle for you to adjust for fitting tight spot. Well, I do not really agree with the statement on tight spot fitting as it takes about 1.5 USB space itself. For horizontally mounted USB port, such as laptops, you're going to have a bad time as it'll take 0.25 USB space of your next USB port, rendering the limited USB port unusable. But still, my obserbation tells me that many of my friends continued to be able to force fit thumbdrive into the next USB port, slanted. Well that's cool but for long term effect on your USB port, it's non of my business.
Back to the topic, as the dongle is 270 degree rotatable for "best-fit", rather than for "best-reception", many users had found it frustrating as the dongle will be out of service maybe in 3 months, 7 months, 11 months, or if you're unlucky enough, just after the one-year warranty expires. This is caused by the twisting and flexing of the internal connecting ribbons whenever you decided to change the angle of the dongle, or rather just "unpacking" the USB side to plug in the dongle. If you're under warranty, yes the replacement is free, however you'll need to settle for RM99 once the warranty expires. Mine quit working after 9 months of fairly light usage, just to surf during critical time where university's WiFi loads webpage slower than a snail. The symptoms, no "power" light even though you'd connected the dongle, nor does it shows up in your device manager.
Anyway I consider myself a happy customer as I was exchanged for a new one for free, with the old one took back of course. However, my friend who sent me this dongle was not very happy with it. It damaged right after the warranty period.
I then offered my help to alleviate the issue, renting my friend the dongle whilst I carry out repair for the dongle.
Joking, the dongle is damn tight sealed and probably cleaner than your laptop.
STEP 1:
First, I stripped out the cover of the dongle on it's back. You might wanna take note of the clips position of you're following the steps here. I used only fingernails to strip the cover, it's only held by clips! Just forcefully slide your fingernail in near the clips and NOT on the clips, once one of the clips gave way, the other will get off much easily in the same way. Be extra gentle so that the clips won't broke of as it's exceptionally fragile if you worked it out the wrong way. I seemed like did not broke any clips so i'm happy :)
Picture are post-pics, that's why you'll find they're wired already.

(WARNING: BEFORE you proceed, have a look on the ribbon located near the rotating
USB male and check the condition of it! It looks like a brown shiny tape with thin shiny copper lines on it. If the ribbon seemed undamaged,
it might not be the fault of the ribbon itself!)
For my case I can see the ribbon copper line is already torn on 2 connection lines. So yeap is literally gone. But i'm not gonna give RM99 to replace the ribbon problem that WILL EVENTUALLY RETURN BACK! This shall be deemed as a DESIGN DEFECT, although it may also be considered as MANUFACTURING DEFECT. And yeap, WE'RE CHARGED FOR THE DEFECT LOL!
Back to Step 1 again, Once the back cover is out, you're gonna be happy as you do not need to work out the front cover. You'll just need to use a precision flat screwdriver and get the circuit board out of its securing clips, no worries to the ribbon, just break it and hold your tears. What you'll get is below:

STEP 2:
Step 2 will require you to remove the soldering connections of the ribbon of the circuit board. You'll need to desolder the connections of the connecting ribbon out. Make sure you desolder and sucker off clean enough on BOTH SIDES and make sure no short circuit between the connections pads on either side. Use screwdriver to divert the solder off or penknife for extreme cases when isolating the two contact pads. Also note that the soldering gun temperature might need to be upped higher (if you have an adjustable constant temperature ones), as the solder is somehow very hard and rather thick.
STEP 3:
(Your warranty will VOID once you perform this step. You may not be able to reverse the process as it involves physical damage to the device. You can always choose to close the cover back and the dealer or retailer can't tell any signs if you broken it apart before.)
Now you'll need to take out the rotating part
of the USB male port. I did it by using a precision screw driver and
pressed down between the casing and the USB male port. A bit of strength
will send the port slid out of its holding places.
After
having fun examine the mechanism of the USB hinge, go to step 4. (Take a plier and
hold the "square" part of hinge, then turn the USB male port, the
"click" is really sturdy made)
STEP 4:
Step 4 will require a functional 4 wire USB cable, with at least one side a USB Type-A, or simply the standard USB male plug. Now about why 4 wire USB cable? Many cables on the market now carries only the "power" lines of the USB, which is only 2 wire as opposed to traditional or "real" USB cables which are supposed to be 4 wires. If you're getting it from printer, harddisk, mouse, keyboard, mobile phone cables, etc which carries data rather than "power" only, you're good to go. If you're thinking of powerbank USB cables, bear in mind that they may not have "data" link supported. To confirm your cable before you messed the cable up like me, plug in your phone and the cable. If you're able to transfer data with the cable, that cable exactly is what we needed.
To show you what happened on my case. I used an old powerbank cable which had loose Micro-USB port, but the result is...

After splicing it I found it has only 2 inner wires inside! We needed 4 wire type to proceed. There goes my charging cable... Saving it for something else for now. (Pic is blur sorry)

This is the correct cable! 4 wires and they adhere to USB colour coding standard! (Adhering to colour code, blue, green, red and white makes identifying the pins easier for connections on Dongle)

Cut the USB cables short! I have learned it the hard way as cables that are too long will affect the reception signals! (See after Step 7) You might also want to measure some distance so that you'll be able to clip the dongle on some places of your laptop for better reception.
Alright we continue to slid the USB cable up to the circular holes. It's a very snug fit for my case as the wire insulation is pretty thick and the hole is really just nice enough for a cable to fit in. Do pull in the wires a bit more as the picture below, you'll appreciate it for easier soldering later.

Get the wires insulation stripped:

STEP 5:
Here's how to get your dongle to work again. You'll need to identify the wires of the USB cable and the dongle too. There is some kind of wordings on each connector pad of the USB, and is easily guessed from its label. If your cable does not follow the colour code, identify them by a multimeter. Anyway you can refer to the pictures below if your USB cable colour code matches.
Oh ya get them soldered! The soldering will test your patience as the connector pad is minute for hand soldering. Be careful not to spill the solder to the next pad or short circuit will occur! Isolate them with method same as step 2, either via screwdriver or pen knife. I took few tries as my solder just spills to another connector pad. (The connector pad surface is also cleaned by the few times solder, making next solder easier and faster) My technique is keeping the wire on the right to its extreme right, while on left to extreme left. Then the solder would just flow as where I wanted to.
An extra note, keep the module with the orange sticker in place and make sure it's tightly fitted to its socket all the time. (It's removable, probably removable to cater for different Wimax frequencies and bands around the world.)
DO MAKE SURE that you check for SHORT-CIRCUIT! Any connections between connector means you shall either:
1) Clean the solder paste off, check for short-circuit! Check for wire or solder paste traces if you've already clean it and still short-circuit! No short and you're ready to resolder.
1) Clean the solder paste off and resolder if your solder paste "mistakenly" flow across 2 connector pads.
2) Make sure the remaining wire strands that are uncovered from solder not to overlap each other, trim them if its too long! A sharp penknife with light pressure and patience can cut the copper wires.


Another side: (Take note NOT TO ACCIDENTALLY resolder the Surface Mount resistors and transistors. Keep the solder paste on connector pads only!)

STEP 6:
DO NOT PROCEED IF THERE IS STILL SHORT-CIRCUIT DETECTED.. This is abnormal, and might be due to unknown reasons, it's better to get a new dongle then to blow up your dongle, and maybe followed up by your motherboard, your computer, etc and probably yourself. DO NOT PROCEED IF you're unsure of whether there exists a short-circuit or not.
UNPLUG IMMEDIATELY upon any presence of smoke, smell, melting of wires or components or your plastic table or whatsoever abnormalities, you've fried something, pray is only your dongle and not anything else!
Make sure the module in orange sticker did not fall out or loosen!
Enough of warnings given before you proceed.
Now plug in your refurbished dongle! Make sure your table is made of electrical insulator and free of any soldering or metal debris though.
Once you heard the USB plugging in sound, you're probably safe, then wait for the red power LED!

You may start connecting software in your computer and test run for a while to see whether the dongle is operating is normally. Of course, unplug upon any abnormalities.
If the reception signal strength is too weak, consider to desolder and trim the USB cable shorter. (See after Step 7) It's handy if you have another dongle nearby so you can compare the signal strength. Mine gives the same signal strength!
Step 7:
Disconnect the USB cable from the computer. Now you're thrilled that you just saved 99 pieces of Roti Canai or 99 packs of Nasi Lemak.
Okays now just reverse back the process. I slowly pulled the wires out of the dongle to shorten the wires inside the dongle. At the final process, I pulled the wires and click the circuit board into place bit by bit. Be gentle as the soldering connections might not be very strong in handling mechanical forces. Finally you'll make a small "U-Turn" with the wire around the dongle. I will say the wires fits just exactly the spaces in the dongle as well!


Close the back cover it back and congratulations! You'd successfully refurbished your dongle!

Close up:


Comparison between Original YES Dongle and Refurbished a.k.a Modified for endurance use!

I bet you'll save even more on long run as compared to purchasing a new dongle as this turgid wire would not break
down as easily and as often as the ribbon, saving you even more than just 99 packs of Nasi Lemak! The electronic
components are solid state and probably Korea manufactured, so it'll
probably last a lifetime! (Even if it breaks down on the same problem, you'll know same steps will revive the dongle)
Of course, i'll now post a proof video that this tutorial works!
Details for wire length and reception:
I had first tried using a very long USB cable from a keyboard. This is the original length of the USB cable soldered to the YES dongle.

It eventually didn't work out as expected as the reception is so bad that it will have trouble connecting. Even if its connected at outdoor, positioned at some weird angles didn't helped. It will keep disconnecting and searching for network, which makes internet surfing impossible. Plugged in an original dongle and Voila, full bar of network. This proves that wires that are too long just doesn't match the original impedance of the intended circuit, or perhaps it''s just pure long wires characteristics which gives lower voltage, thus lower reception and so. The issue is solved once I trimmed the wire to a shorter length, where the pictures and steps of the above are actually taken during this second attempt.
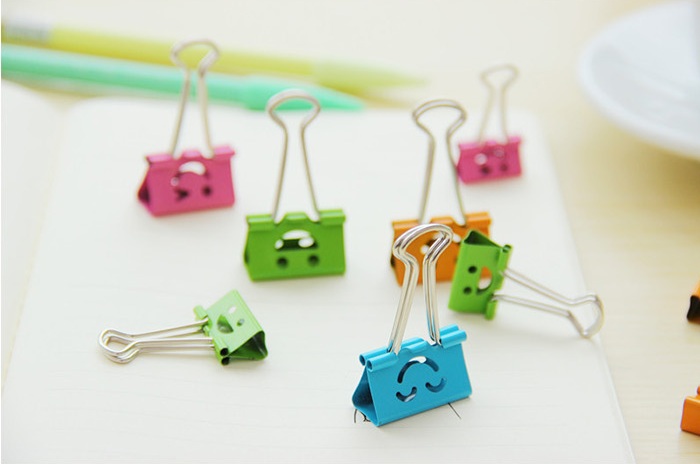
You might wanna get some bulldog clips to secure your dongle and wires in a position of better reception. Or cute binder clips to show off your personality as well!
UPDATE:
If you're experiencing this problem where you had plugged in your dongle and red light is on, and
1) "Connect" says "We can't detect your Go. Please quit connect and remove your go....." . OR
2) Device Manager had identified the Yes Go "Connect" shows "Please insert your Go."
 The solution to the problem above is to run the "Connect" as administrator. Then it will detect your go accordingly. This problem is evident on the first restart after installing the software on your PC. Also occurs after rebooting your PC and plugging in the dongle for the first time. After the first time, you may not require to run the program as administrator anymore. However, I do recommend so to avoid problems later.
Now i'll show you the QUICK FIX to this: (Permanent fix below)
These steps will set the "Connect" to run as administrator only for the time it is launched.
1) Navigate to the start menu and find the "Connect" program.
2) Right click it and select "Run as Administrator".
3) A prompt will pop out asking for User Account Control, just click "Yes" and will do. The screenshot as per below:

The PERMANENT FIX will be as below:
These steps will set the "Connect" to run as administrator every time it is launched.
1) Navigate to the start menu and find the "Connect" program. (Windows 7 or other OS skip to step 2)
2) Right click it and select "Open file location". (Windows 7 or other OS, open file explorer and navigate to the "connect" folder at "C:\Program Files (x86)\Yes\Connect\Connect.exe")

3) Right click the "Connect" icon and choose "Properties". (May look different but steps are same)

4)In the "Compatibility" tab, choose "Run this program as an administrator". Click "OK" and you're done!

Hope this helps and clears off many doubts and questions on forums and internet!
I had first tried using a very long USB cable from a keyboard. This is the original length of the USB cable soldered to the YES dongle.
It eventually didn't work out as expected as the reception is so bad that it will have trouble connecting. Even if its connected at outdoor, positioned at some weird angles didn't helped. It will keep disconnecting and searching for network, which makes internet surfing impossible. Plugged in an original dongle and Voila, full bar of network. This proves that wires that are too long just doesn't match the original impedance of the intended circuit, or perhaps it''s just pure long wires characteristics which gives lower voltage, thus lower reception and so. The issue is solved once I trimmed the wire to a shorter length, where the pictures and steps of the above are actually taken during this second attempt.
You might wanna get some bulldog clips to secure your dongle and wires in a position of better reception. Or cute binder clips to show off your personality as well!
UPDATE:
If you're experiencing this problem where you had plugged in your dongle and red light is on, and
1) "Connect" says "We can't detect your Go. Please quit connect and remove your go....." . OR
2) Device Manager had identified the Yes Go "Connect" shows "Please insert your Go."
Now i'll show you the QUICK FIX to this: (Permanent fix below)
These steps will set the "Connect" to run as administrator only for the time it is launched.
1) Navigate to the start menu and find the "Connect" program.
2) Right click it and select "Run as Administrator".
3) A prompt will pop out asking for User Account Control, just click "Yes" and will do. The screenshot as per below:
The PERMANENT FIX will be as below:
These steps will set the "Connect" to run as administrator every time it is launched.
1) Navigate to the start menu and find the "Connect" program. (Windows 7 or other OS skip to step 2)
2) Right click it and select "Open file location". (Windows 7 or other OS, open file explorer and navigate to the "connect" folder at "C:\Program Files (x86)\Yes\Connect\Connect.exe")
3) Right click the "Connect" icon and choose "Properties". (May look different but steps are same)
4)In the "Compatibility" tab, choose "Run this program as an administrator". Click "OK" and you're done!
Hope this helps and clears off many doubts and questions on forums and internet!
7 comments:
Hi, I got a problem YES Dongle too, and when I plug in, computer shows "USB device not recognized" error message. There is a red light from the Dongle.
Do you think I can solve my Dongle problem using your method as well?
images:
[url=http://postimg.org/image/q221ubz63/][img]http://s17.postimg.org/q221ubz63/20141209_125621.jpg[/img][/url]
[url=http://postimg.org/image/f16wpb6x7/][img]http://s17.postimg.org/f16wpb6x7/20141209_125744.jpg[/img][/url]
[url=http://postimg.org/image/qc9kdodsb/][img]http://s17.postimg.org/qc9kdodsb/20141209_125803.jpg[/img][/url]
[url=http://postimg.org/image/fzn9rlk97/][img]http://s17.postimg.org/fzn9rlk97/20141209_130147.jpg[/img][/url]
[url=http://postimg.org/image/v9n4ysfrf/][img]http://s17.postimg.org/v9n4ysfrf/20141209_130158.jpg[/img][/url]
[url=http://postimg.org/image/gb4q4d0p7/][img]http://s17.postimg.org/gb4q4d0p7/Screen_Hunter_01_Dec_09_12_59.gif[/img][/url]
This seemed to be more possible on the problem with drivers as compared to hardware fault. Try go to YES website and download their installation cleanup utility, reboot, reattempt to reinstall with the latest software from their website, and reboot. That should work.
The latest update had already patched the Windows 8 platform. You should run only the latest program builds downloaded from the YES website. I have no issues on software side, i'm posting with dongle plugged in on Windows 10 now.
Hai, my dongle also got problem, it cant connect and the red lamp doesnt even light, may you help me with this?
SC:
You may check the updated post. You just need to run the program as administrator to solve the problem.
Asha Leona:
This means most probably the ribbon broke as the dongle can't even power up. Time for DIY!
Hi
can you label the wire code color like which one data+, data-, GND, PWR.
(from google
pwr - red
black - gnd
white - data+
green - data-)
and at the board, which one for data+ and data-, coz mine one cannot see clearly that label on board,
Hi
can you label the wire code color like which one data+, data-, GND, PWR.
(from google
pwr - red
black - gnd
white - data+
green - data-)
and at the board, which one for data+ and data-, coz mine one cannot see clearly that label on board,
Hye. Recently discover you post.. Do you do any service for refurbishment of yes dongle. Obviously not everyone have solder to DIY. If you can help me fix my dongle, it would be a great help
Post a Comment